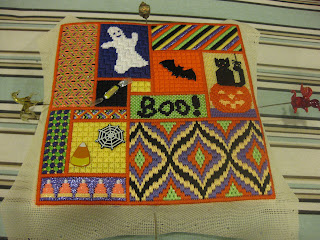
Here you can see one of the scrap booking brads I used. At the rear I over stitched the brad legs just in case any little hands decide to give a pull.
More brads and the candy is a sticker with the sticky removed and stitched in place.
Just so you can see it being blocked.
This is the fabric to go around the sides of the block, you need to measure the sides and add one inch for the hems.
In this case I also cut the fabric on the bias to get the diagonal effect that matches a section in the needlepoint piece.
I would not recommend that a beginner does this as the bias edges stretch which can cause problems.
Quilters batting cut just a tiny bit smaller than the cube, front back and sides.
This helps even out any unevenness in the piece due to embellishments etc.
After removing from the blocking board I trim the canvas and finger press the edges.
Batting placed on the canvas (could also place on the foam block).
I started by using large pins (aren't these pretty) to give me the extra pairs of hands I always seem to need.
Pin the canvas to the block, don't be afraid to use too many pins.
Nicely fold the excess corner canvas in and again pin.
The same is then done with the backing fabric. Remember to put the batting under this for a softer look.
Batting strip again for a softer look and help cushion the folds in the canvas and backing fabric.
Now this is a personal preference. You could over lap the ends of the side fabric, but the sewer in me had to measure and do a seam.
In the instructions I found on this technique the edges are not sew in place. Again this just did not work for me so out comes the needle and thread.
First I pinned the hem to the edge of the needlepoint.
I stitched this in a similar method to how I attach a cording.
It works really nicely and pulls everything together.
To get to the next stitch into the canvas I travel the needle inside the fold of the hem so the stitch is only seen on the entry and exit points.
Then down into the canvas being careful not to split the threads.
The back and sides are stitched using a ladder stitch which in this case means traveling inside the hem of the side and along the edge of the back.
For more info on ladder stitch try this link.
http://www.youtube.com/watch?v=5CjOXMuTFXo
I also added some feet made from unfinished wood parts (JoAnn Fabrics).
I know that online these cubes have fancy bows on top, I tryed one and it was just too fussy for my taste.
I hope you have enjoyed this latest in my finishing tutorials. I think I will have to start giving classes soon.


It looks awesome and the fabric is perfect. I am in the "no bows boat" too. Very nice blog.
ReplyDeleteIt looks awesome! Your patience in finishing this really is impressive. Where can we buy this pattern?
ReplyDeleteWhat type of block did you use?
ReplyDeleteWhat type of block did you use?
ReplyDeleteWhat type of block did you use?
ReplyDeleteshe probably used styrofoam
DeleteThank you for the tutorial!
ReplyDelete