May and I've finished the first of my girls Christmas ornaments. This part of the Cozy Caps range by A Collection of Designs.
I used different threads than suggested but for the most part used the stitches suggested.
This is the cap prior to finishing.
Although I am not a great fan of ultra suede that was the only green that I had that fit the bill
First I roughly cut a piece larger than needed.
Place backing fabric right side to rigth side with the piece of needlework.
Here you can see I have started to stitch around the cap. As I am intending to line this the bottom will remain open.
The sewing thread is a hand quilting thread and I use a back stitch.
This step may also be done by machine but I wanted to show that anyone can do this even if they don't own a sewing machine.
Before I get to the make a simple tassel using some of the threads used in the stitching.
If one is not using cording around the ornament then this would also be the time to insert a hanging loop.
The tassel in place
Then finish stitching around the ornament. Remember to leave the bottom open.
Trim away any excess fabric and canvas
Snip into any curves being very careful not to cut the ornament.
Turn the piece out.
Yeh now the ornament is beginning to take shape.
Finger press the bottom hems inwards.
Select your lining fabric. I chose to go a bit funky.
Carefully draw around the edge of the ornament.
This will be your stitch line.
Again this step can be done by machine. I did it with a simple running stitch.
Again finger press the bottom hem.
Here the lining is inserted wrong side to wrong side and pined in place.
If using cording leave a gap at the both side seams as this is where you tuck in the ends.
Now I use a ladder stitch to attach the lining.
Insert one end of the cording in the gap left
Using a stabbing stitch attach the cording. Burying the the cording so it is unseen.
Unless you have being doing fine hand sewing for many years use a matching thread.
I attached the cord around half the bottom then went up the side, made the hanging loop, down the other side and finally complete the bottom.
Sunday, May 15, 2011
Friday, May 13, 2011
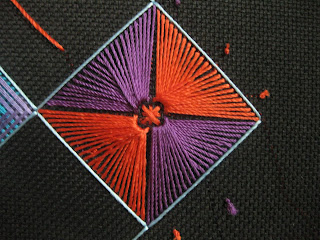
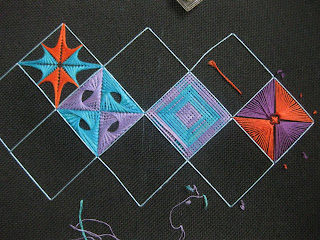
May and the attack of the brights
I found the instructions on this one a bit confusing but after looking closely at the original picture I got there.
The pictures don't show the true brightness of my colours and the effect of the silk.
Beginning to wonder if this is all going to work out in a pleasing manner. I will continue as each month takes a very short time to complete. That and the fact that my orange fan thinks it is wonderful.
The pictures don't show the true brightness of my colours and the effect of the silk.
Beginning to wonder if this is all going to work out in a pleasing manner. I will continue as each month takes a very short time to complete. That and the fact that my orange fan thinks it is wonderful.
Tuesday, May 10, 2011
Krenik Thread
Krenik have just featured this blog on their facebook page. Feeling like a little child at the moment.
Friday, May 6, 2011
Spring is blooming
Well it would appear that my new flower has fallen down.
This one seems to have ended up as an exercise in couching. Blame Smith and Owen of Grand Rapids. I went in for the basic block kit and they tempted me with a new selection of grosgrain and velvet ribbons.
Then to add insult to injury they had this lovely fabric (okay and a few more that may appear at a later date) that I have used on the leaves.
For the stem I used three lines of Kreinik ribbon stitched down with their black #8 cord.
These are addictive blocks that stitch up in no time.
Mothers Day Card
I made this card for my MIL. I need to start thinking about a card for my Fiona's 10th birthday and a nephew.
Subscribe to:
Comments (Atom)


